Blink, Do: Make Your Computer Commands Brain-Powered

My name is AJ. I'm 15, I'm in grade 9, and I have a huge passion for technology. At the moment, I am into Brain Computer Interfaces and am very excited about the future of this technology. Some of my hobbies include app development, making games, and doing cool stuff with my EEG headset (it's fun controlling your computer with your brain). Here, you'll see my projects and articles.
Controlling things with only your mind has always been something straight out of sci-fi. What if I told you that any one of us could control our computers with only our minds? 🧠
In this article, I’ll show you how I got my computer to do certain programmed commands with signals from my brain. The main objective here is to do an action such as blink, clench your jaw, or change your brain’s focus and have it do something on your computer. 🖥️
Here Is The Hardware/Software Used For This Project:
Hardware:
- Muse 2 Headband (This can be really expensive sometimes. Luckily, I was able to get it on sale and used a promo code that reduced the price by a lot. If you can’t afford it, I’d also recommend buying one from Facebook marketplace. If you’re a fellow student, maybe you can negotiate for the price a little.)
Software:
Python (I used version 3.11.0, I’d recommend this too)
VsCode (You could technically use the python IDLE, but this is just much easier. Highly recommend this or any other established IDE you prefer.)
Setting Everything Up
Step 1 - Installing Blue Muse:
First, I installed BlueMuse — this app is used to get the live streaming data from the Muse Headband. If you need some help, they have the exact installation instructions on the GitHub page.
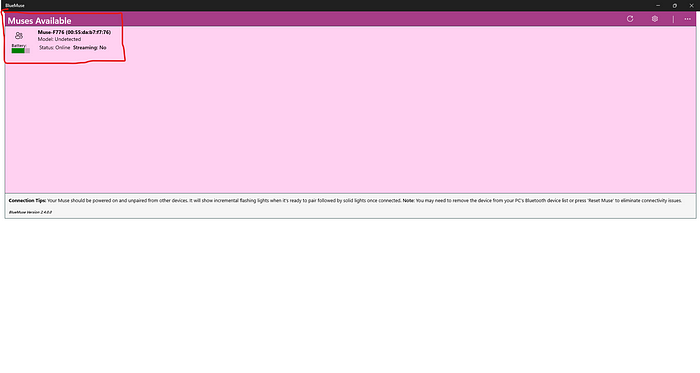
Next, open up the BlueMuse app and turn your computer’s Bluetooth on. Once you’ve done this, take your Muse 2 Headband out and turn it on.
In the BlueMuse app, you should see your Muse Headband come up. Click it once and then click start streaming.
You should see a new window pop up showing you the streams that are now collecting the data from the muse.
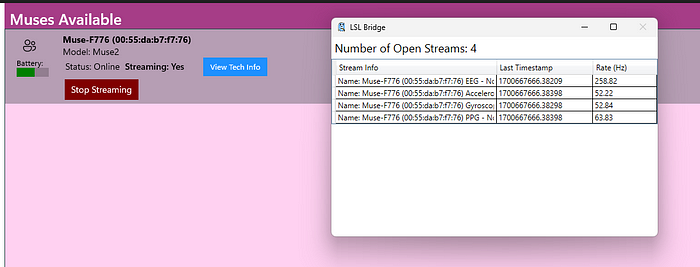
Obviously, we don’t know exactly what these numbers mean, and that’s where MuseLSL comes in.
Step 2 - Installing and Working With MuseLSL:
I installed MuseLSL from the GitHub installation instructions
After that, I ran $ muselsl view in the CMD, and it showed me a visual graph of all the data so I could view it. A new window opened showing me something like this:
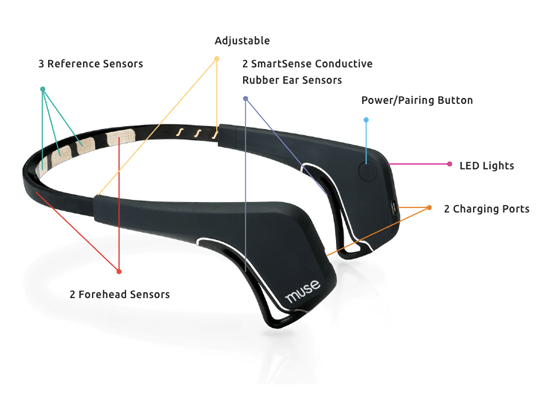
From here, I was able to identify which sensors were the most stable (TP9 — the left ear sensor and TP10 — the right ear sensor). This will be used later on. Now that I verified that my Muse was working and was able to connect, as well as stream data to my computer, I turned it off to save the battery. (Don’t worry, we’ll turn it back on later)
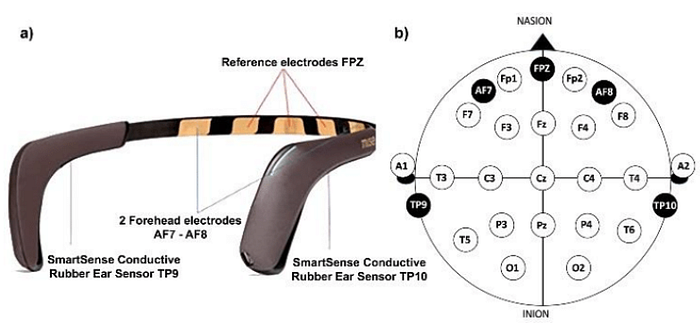
Specific Sensors
Step 3 - Setting up the code:
Time to get to the fun part, the part where we can tell the computer what to do!
First, download python version 3.11.0. Even though there are newer versions, this is one I know for sure works and all the libraries work with.
If you’ve never programmed before, I’d highly recommend getting an IDE such as vscode as it makes coding much easier instead of the default python IDLE. It’ll also help you debug and find errors/missing libraries much easier. For the sake of this article, I’m going to use vscode.
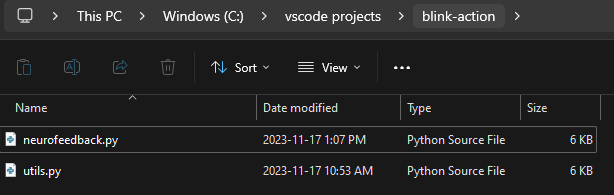
Now, go to the MuseLSL GitHub page and download the neurofeedback.py and utils.py files.
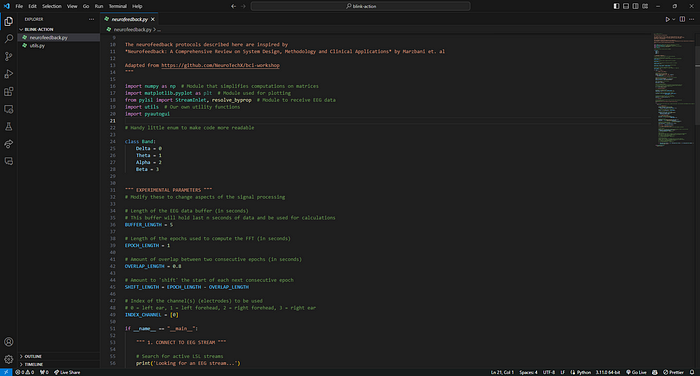
Put them in a folder and import that folder into vscode.
IMPORTANT:
- You are probably not gonna have all the libraries downloaded in order for the code to work. You can use pip to install them, for example,
pip install pyautogui
If you search up the libraries online, you can get all the commands you need. Make sure all the libraries from neurofeedback.py and utils.py are downloaded.
Remember when we identified the most stable data coming from certain sensors using the MuseLSL graph? Well, this is where that comes into use.

Edit the above code to whichever sensor was the best for you. You’ll see a comment showing you what the numbers mean and which sensors they represent.
I then changed this code to only show the delta waves as these will show us all we need:

If we were to run this code while our Muse headband was connected and the streams were collecting data, we’d get a bunch of numbers. To display this, I’ll add a quick if statement and show you guys how exactly this works.


As you can see, whenever I blink, in the output, the if statement comes into play and prints that message.
The Programming
Finally, we’ve gotten everything set up and it’s time to work the magic!
For this, I installed pyautogui in the CMD through this command:
pip install pyautogui
Now that that’s done, remember the if statement we made earlier? We can just add some code to that.

Here I added this code to the if statement:
pyautogui.press('space')
It doesn’t need to be said, however, this makes it so that if I blink or do any other action, it will send the command of pressing the spacebar to the computer.
To test this, I’ll be playing the dino game.
The Test
Let’s get started. Connect your Muse headset to BlueMuse, go to the dino game, run the neurofeedback.py file, and get blinking!
Final Words
This was definitely a cool project, and is just an intro to the world of BCIs. An extension to this project would be making a different if statement for the down arrow so the dino can crouch. For example, maybe you have to work harder and do a more forceful action and make it so that if the waves are above 2, it’ll crouch.
Obviously, the dino game was just an example, there’s a lot more we can do if we code it some more and have a more complicated program.
This really goes to show the amount of things we can do with our minds if we just have the tools to. These tools are brain-computer interfaces. They’ve really inspired me and I’m glad I had the opportunity to make this project and share it.😀
Demo Video
Here’s a demo video of me testing the project:
https://www.youtube.com/watch?v=FOO1EqAL-Ho
Hey! My name is AJ and I am a 14 year old who is interested in technology, specifically new, upcoming, and innovative tech! I like to learn and explore said technologies.
Contact me here: abhijay.work5002@gmail.com